Mod Men

Tuesday, November 29, 2011

The Hmm Factor


We tackled most of the Christmas decorating last night. It is always fun unpacking and unwrapping all of the decorations you lovingly stored away the year before. There is a comfort that comes with putting out your old favorites and adding new ones you've picked up along the way.

There is also another part to decorating, one that is rarely talked about for fear of ruining the budding holiday cheer. I call it The Hmm Factor. "Hmm" being the sound you make as you stare at your decorating space, stumped, paralyzed, unable to move forward. Simply explained, it is the moment when you hit a decorating wall. 


This is a wall that threatens carefully crafted moments of jubilee. Moments where you take the time to enjoy the fact that Christmas is here once again and you are beautifying your home at a leisurely pace. Bing Crosby is crooning White Christmas in the background and your Frasier Fur candles are lit, wafting the scent of fresh pine around the house. You've arranged, rearranged, moved furniture, added a Santa here, a snowman there and yet...


I encounter this every year. No matter how often I mentally decorate in advance, The Hmm Factor eventually comes ... cue entrance of husband ... take in wife's puzzled expression ... husband asks "what's wrong?"


Kyle has a very good eye, on top of that, he is a very smart man. He will stay out of my way let me do my thing until the "hmm-ing" starts and then, only then, see if he can lend a hand. After a few moments of talking through my original vision, he has moved one or two things and voila! It is nice to have a partner in crime who also happens to have a knack for decorating.


I woke to a festive holiday home this morning. I am not sure about you, but it takes me a while to get used to a newly decorated house - especially if I'm not fully caffeinated. So when I wandered downstairs with Ranger at 7:00am, our collective efforts brought a smile to my face. Christmas is here! 


Now we just need the tree.


What is your holiday decorating quandary?


Monday, November 28, 2011

Walking in a Celadon Wonderland

We just got back from our first holiday road trip.  I don't mind road trips. In fact, I really like them. They offer freedom and flexibility that you don't have with planes, plus we can take the dog.

This is Ranger. He is the best pup in the world. I am positive that he posed for this.
This Thanksgiving, we decided to pack up the car and head to Florida to visit with my in-laws.


On the way we stopped in Charleston to visit with friends and during our stay we wandered into a wonderful store called Celadon. If you live in the Charleston area, then this place is probably old news to you. I imagine that if Anthropologie and Pottery Barn had a baby, Celadon would be their glorious offspring.


Lucky for us, they had already completed their holiday transformation and it was positively drool worthy...


While wandering through the loveliness, I noticed some amazing driftwood Christmas trees. Unfortunately, I didn't think to take a picture, but I found some online that were similar....


I love the look of these, but Celadon was selling theirs for $100 - $200 each, which was a bit steep for me. They were beautiful and sturdy, but I knew that giving into my urge to buy them would only lead to buyers remorse.  If anyone has any ideas about how to recreate one, let me know.


While I didn't buy any home furnishings or decor, the store displayed things in ways that gave me some great ideas for new projects. Some were new and some that just validated my current project list - sunburst mirror anyone? 


Even though I couldn't buy everything I was lusting after, I did leave with one little thing...


Thymes Frasier Fir candle is quite possibly the best smelling Christmas candle EVER! I will be lighting it this evening to kick off the holiday decorating.

Check in tomorrow when I reveal the buffet progress!


Thursday, November 17, 2011

Oh, Buffet...How I Love Thee!

I am happy to report that the buffet is 95% finished! I was going to wait until we reached the 100% mark, but I was so tickled with the results that I had to share. Before the big reveal, let's do a quick recap:


If you remember, when I found the buffet it looked like this...


But, knowing that beauty lies within, one must look past the exterior (which at the time I found it on the street corner, was covered in puke green paint) and see the potential of something.


So with the help of my friends and family...


and a pup who insists on being present for all major projects...


you can transform something rather hideous into this...


Buffet? Is that you? Well don't you look fabulous!


Let's break down this furniture transformation: 


- We stripped off about three layers of paint, circa 1970, sanded and buffed the exterior.


- The buffet originally came with spaces for two small side drawers - one of which was missing when I rescued it - and two cabinet doors. Since it would look weird with a missing drawer, we removed the cabinet hinges and sawed off the frames for the top two drawers to open it up as display space for vases, coffee table books, etc.


- We primed and painted, using Sherwin Williams Iron Ore for the exposed interior space and Sherwin Williams Comfort Gray for the exterior.


If you recall, I had originally intended to use Milk Paint, but when I priced it out, it was far to expensive and I couldn't justify the cost for this piece. So I decided to use paint that we had on hand after tackling a kitchen makeover a few months ago. Trust me when I say that there was no shortage of options in our basement. When we started the kitchen project we weren't sure what color to use and ended up with no less than 12 paint swatches on our wall - it was literally ceiling to floor.  


To help us sort through our swatch dilemma, I jumped onto Nesters blog to use her color palette as guidance and fell in love with Comfort Gray. Unfortunately for our kitchen, it didn't work, but as the base color for this piece, it looks pretty awesome! 


Obviously we are missing knobs and before it's all said and done, I'll probably apply an antiquing glaze and a coat or two of poly to protect the top. These final details need to happen in the next two weeks as we will be hosting family for the holidays and this piece is currently living in our guest room, so no pressure.


What do you guys think? 


Wednesday, November 16, 2011

The Forgotten Room

Our guest room is nice enough. We obviously don't spend a lot of time in there since the room is for...well...guests. So, short of making sure that the sheets are springtime fresh, we just check in every now and again to confirm everything is tidy and that the dog hasn't jumped all over the bed.


The other day my husband suggested that since we are moving things around in our house, we should redecorate that room as well. Getting the green light to start a new project is like getting an early Christmas present and I am thrilled with the idea of changing things up a bit.


Now that the buffet is so close to being done (we decided on a shade of light gray for the exterior), we can start to look at potential color schemes for that room overall. Right now, I like these....

Do you guys think that the yellow/gray combo is over done? Any other suggestions?

Gray...What?

I had hoped to post pictures of a near-complete buffet today, but sadly, we've run into a bit of a snag on the paint front. 

When we stripped the paint off the buffet, the wood wasn't really in great shape. I didn't realize it at the time, but it was very dry and at this stage it is making painting near impossible. The poor thing is so parched that it has been soaking up white paint like it's going out of style and since the original wood is cherry, the whole piece has taken on a pink tint. Those who know me, know my love/hate battle with all things pink, but that is another post.

So, now we have been tasked with selecting a color that can cover the piece well, even it were to soak in more than we would like. 

Enter, my brilliant husband with solution to aforementioned problem!....

The open shelf spaces have been painted a charcoal gray and look amazing. So, Kyle suggested that we paint the outside a lighter gray to compliment them. I have to say that I was not instantly enthused by the idea, but after tooling around online for gray pieces of furniture and living spaces with that motif, I think I have a new obsession with gray decor.

I love how it can be quietly elegant and then completely transform with pops of color! 
Do you guys have any suggestions for hardware choices? Should we stick to metal or do colored enamel?


Monday, November 14, 2011

The "To Do" List

Last week, I mentioned that at any one time, I have (on my person) a list of projects or crafting ideas. Even as I walk around my house, mentally moving things, I have my phone with me and I'm taking notes.

My husband, Kyle - on more than one occasion - has found me staring at walls or rooms in our house and when he asks me what I'm doing, I happily reply that "I'm mentally decorating." This answer is usually followed by his swift retreat in the opposite direction and some mumbling of "heaven help us." Regardless, he is always the first person to lend a hand or ask me how a project is coming along. I'm a lucky lady.

Here is my current To Do list:

1) Finish the buffet!

2) Paint the guest room and change up motif, using things we already own.

3) Make no-sew drapes for the living room and kitchen.

4) Frame Etsy prints from StrawberryLuna and hang them in the stairwell leading to our second floor. I would love to find thrifted frames in unique styles and paint them all white!


5) Hang old china plates and silver servers in the kitchen above the cabinets.

6) Find a cheap, natural fiber rug for the living room and move the living room rug into Kyle's office.

Oh yeah, before I forget...

7) Touch-up paint from the kitchen and master bath transformation (Honey, I swear this will get done!)

What is on your To Do List?


Friday, November 11, 2011

The Search Is Over!

Last Christmas my mother-in-law, Sherri, was given an amazing brown suede, asymmetrical jacket with a super soft, faux fur lining. This awesomeness was only topped by the fact that the jacket was purchased at Stein Mart at a great price! 


It's one of those Christmas moments, and let's be honest and admit that we have them, where someone gets something that you never knew you wanted and immediately wished you had. 


Plotting to steal it didn't happen right away. The thought only crossed my mind after asking to try it on, which I knew was a mistake, but I did it anyway. It was like wrapping myself in a warm, super chic blanket. A blanket that would look awesome with skinny jeans and boots and chunky jewelry....sigh.


Suffice it to say, I've been looking for it's equal ever since. Making up all kinds of reasons I didn't need or want one, mostly because similar styles I've seen cost upwards of $250! Yeah, that's not gonna happen. 


Enter solution to problem, HauteLook. HauteLook, like RueLaLa and Ideeli, gives it's members access to designer products for a fraction of the average retail cost. Inventory is limited, and because of that, these sites attach a time limit to how long you can keep items in your cart without purchasing. 


A site structure like this makes fake shopping extremely difficult. Since that is generally the only way I know how to shop these days, I have never actually purchased from these sites...until last week...when I found this...


Do you love it? Because I love it. It is by Romeo & Juliet Couture and when I spotted it,  I immediately started drooling on my keyboard. 


Ok, so it's not exactly the same as the "Sherri" jacket. For starters, it's black, not brown. The lining is shearling, not fur...but I don't care. It was the overall shape of the original jacket I loved and I think that this version is more "me." 


Best of all, this jacket retails for $195.00 and on HauteLook it was $59! That's right kids, 70% off. Crazy!


My husband and I try not to buy things for ourselves close to Christmas. Our families would prefer that we just add them to our wish lists, but I'll admit that limited inventory and a shopping cart countdown got to me a bit. Plus there honestly aren't too many things that I obsess about for a year or more, so it was time to nip this in the bud.


Another kicker about this purchase is that yours truly was tooling around on Shine's Winter Style Guide the other day and found this listed among their top picks:


Thank you Shine for validating my purchase.


What fashion or home decor items have you been searching for/lusting after?


Thursday, November 10, 2011

Canny Crafting

I may be biting off more than I can chew, but starting next week I am going to line up a weekly craft project for a series of posts, aptly titled Canny Crafting. I know, very original. 


Ideally, projects will be introduced on Friday and pictures of the finished product and How To's, posted on Monday. 


Again, from a timing perspective, this could be an awesome thing to attempt, or I could fail miserably. But I figure that I am adding an extra layer of accountability since other people would be reading this...right?


Since my husband reads this from time to time, I will add this disclaimer: Honey, I promise to fix the paint in the bathroom AND kitchen (remnants of two impromptu room makeovers) before passing GO and before collecting $200. Then, and only then, will I move on to aforementioned crafting. Love you!


Like a good DIYer, I have lists of projects somewhere on me at all times. Whether it is a post-it in my car, or notes on my phone, I am always thinking of things I would love to create or replicate. I have had a "hot list" for a while, but when I found the buffet, they were all promptly put on the back burner. 


So, here are the three projects that were next on my to do list:


1) Sunburst mirror - Sunburst mirrors are everywhere and getting them on sale is impossible. Furthermore, the "sale" price still ends up being $60-$80 and that doesn't quite do it for me. I am still not sure what the materials will be just yet, but there are quite a few twigs in our backyard so I may just recycle those. 


2) Faux mercury glass lamp - My grandmother's old lamp has been sitting in my basement collecting dust and could serve as a great test run. I will be using Krylon Looking Glass spray paint to give it the mercury treatment. I bought the last can of it at my local Hobby Lobby and while I haven't used it yet, I'm actually going to go back and buy a few more cans to prepare for the this project and others to use throughout the holiday season.


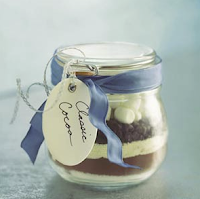
3) Hot Chocolate jars - A great Christmas gift I have been seeing on Pinterest and on fellow bloggers sites. Coco powder, brown sugar and chocolate chip goodness beautifully layered in jars, slap on a ribbon and dainty holiday tag and voila! The nice part is that with a few additional ingredients, you can make Peppermint and Mexican hot chocolate jars as well. Something for everyone!


Let me know which of these you would like to see me take a stab at first OR feel free to suggest a project that's been on your mind and I will add that to the line up!

Happy Crafting!


Meet My Arch Nemesis

This wall is the bane of my existence. I am not exaggerating. I stare at it constantly. I don't fear blank space, but there is something unbalanced about it that makes me want to tear my hair out.


For the last three years, I've hated this wall and the space around it and been paralyzed. I have no idea what to do here!


Adding insult to injury is the fact that this wall is in MY room and has MY television on it!

What is with all of the "me, my, mine?" The television on that wall is the girl TV. The only one in the house that is allowed to house all of my girl shows on its DVR. The shows that my husband watches with me (when I beg him to) and complains that my taste in quality programming is debatable. I'll save that for another post. 

The Nester posted her wall drama a few days ago. It was comforting to read that my obsession with a wall is not limited to, well...me. Nester is in a healthier place though, having moved from a place of hate to one where she loves her entertainment wall!

The way I see it, I have three choices:

1)  Watch my girl shows in my husband's man room - which is a strange sentence to read, let alone make a reality - in an effort to avoid the frustration that comes with watching TV in our living room. 

Let's be honest, I doubt he'll want to scroll through recordings of
Revenge, The Vampire Diaries, Say Yes To The Dress, etc. saved on his man TV, in front of his friends. So this is probably not going to fly.

2)  Deal with it. Find a way to live in harmony with this wall as is and drop my oars. I don't think this will ever happen.

3)  Find a creative solution that will solve my problem and lead to a happy living room experience and comfy place for girly TV time.

I like Option 3.

Anyone care to weigh in on how to change this wall? Any and all creative solutions welcome!

Wednesday, November 9, 2011

Lessons in DIY

On the road to becoming an expert on all things related to furniture restoration, there is many a lesson to be learned. Here is what I have found so far...


Lesson #1: Know what you don't know...and then ask! 
I know that there is a lot I don't know. Lucky for me, I have a great group of friends with varied interests, who are willing to teach.


Nothing is more true in the case of this buffet. Without my friend Karen suggesting it, I never would have thought to strip the paint first. Inevitably, I would have just power sanded the heck out of it and who knows how it would have turned out.


Lesson #2: Being crafty is one thing, handling power tools is another.
Upon further inspection of the piece, I decided that it would look ten times better if we just got rid of the side drawers and by extension, the frames they sit on. 


Well, there was no way that those frames were going to come out without serious power tools. Items that my husband and I do not own, mostly because we have never needed to. 


So, when you encounter a project that requires more heavy lifting than you have experience with, turn to your friends, family or fellow bloggers for help. Trying to accomplish this on my own would have been a big no, no and in the end could have cost additional time, money or worse an appendage. 


In this case, our good friend Chad is a seasoned home improvement guru who kindly offered his expertise and his circular saw. By "offered" I mean that I begged and he agreed. 


Lesson #3: Accidents happen and it's not the end of the world. 
I don't know too many DIYers that don't make mistakes every now and again. In the case of the buffet, we ran into a minor snag - because of the angle of the drawer frame the circular saw cut into the top of the buffet, but only slightly. 


Chad felt pretty bad about this. Keeping things in perspective, this project is about fun and creative solutions, so no time was spent crying over spilled milk. 


We quickly decided that with a little wood putty and paint, you would never know this was even there. Unless someone decided to document it on a blog...which lives on the Internet...for everyone to see. Oh well, you know what it would be like.


Lesson #4: Follow your instincts!
I had a few moments of self doubt watching Chad take out the drawer frames. 


After all, I was modifying the look and feel of something that was never intended to be open at all! It had side cabinets and drawers and I didn't build the thing so how could I know what it would look like? Who do I think I am anyway?


Well after my minor panic attack, some sanding and some wood putty. I stood back and looked at what had been accomplished...


Now I know it doesn't look like a lot right now, but it made me smile. With some fresh paint and knobs, this is going to be stellar. 


I don't know where or how this lived in it's first home, but I truly feel like it is going to be a piece of furniture our family has for a long time to come. 


It's not just a face lift, it's a complete makeover and I cannot wait to share the results with you!


If my followers have any other cardinal rules of DIY to share, please post! I, like this buffet, am a work in progress and welcome any helpful tid bits for future endeavors.

Tuesday, November 8, 2011

Confessions of a Fake Shopper

I fake shop. I'm not proud of it, but what is a girl to do? Living on a budget with high end taste is hard. I'm not hurting anyone and it scratches an itch, sort of.


What is fake shopping? By definition, it is the practice of searching your favorite online retailers, filling up your virtual shopping cart with goodies and then...sadly...abandoning it to avoid buying. How bad is my habit? Well, when I fake clothes shop, I actually take the time to fill in my size! Pathetic, I know.


As a rule, fake shopping should be limited to online only. If you tried to do this in person, I imagine one of two things would occur: 1) You would fail miserably and purchase something (which if you haven't yet figured out, is not the goal) OR 2) Efforts to physically abandon your cart would peg you as that crazy woman who ran out of a store leaving a basket full of merchandise in her wake. Suffice it to say, the online world decreases the chances of those things happening.


I actually take great comfort in knowing that I am not alone. Like many women, I confessed this little tidbit of information to my stylist/therapist, who gasped and told me that she did the same thing. It was a bonding moment for us. Now we start most of our conversations with "so when I was fake shopping the other day..."


I am not saying that I don't buy things anymore. I do and I try to limit it to something that we absolutely need, or have convinced myself we need. 


In all seriousness, what fake shopping has given me, besides a false sense of satisfaction, is a slew of ideas! I think about how to change an old cardigan with new buttons or what a forgotten mirror would look like painted red.


So, if you are like me, full of ideas and low on funds, fake shopping just might be the best-bad habit to have.


Monday, November 7, 2011

Milk in paint? Who knew?

My husband and I are still working on figuring out our design style - contemporary, country, vintage, classic? As we settle into our first home...in our third year...we are letting it evolve with our changing tastes. Currently, I feel like we are leaning more towards what one might call "rustic chic." So, as I consider a finish for the buffet, I am taking into account what our tastes are now  and how we can create something that will transition well into the future.


When we first mentioned this to our friend Karen (the one who I still owe big time for helping me strip off the ugly army green paint), she said that we should consider using Milk Paint to finish the buffet. After a bit of research I am super excited to play with the stuff. 
Apparently, it is an old school formulation used to achieve a distressed look. While we have never really gravitated toward a shabby chic style, I love the look of distressed furniture. Done well, it can have a lived in quality that is still very high end.


I have been researching the basics of the application on one of my favorite sites, Design Sponge, and while it is going to be a bit more labor intensive, I think that we will be thrilled with the results.

Bonus detail: milk paint is all natural, free of harmful chemicals and noxious odors! 


Friday, November 4, 2011

Color Me Happy


When I first picked up the buffet, I thought to myself "you are destined to be painted a clean and bright shade of white." However, after pouring over the pages of Pinterest, I'm not so sure that white is the best choice. 

The buffets and sideboards below are in awesome shades of yellow, blue and a fabulous orangey-red. I threw in examples of ivory and white as comparisons, but I am very conflicted.

So, while I can't say for sure what the final color will be, I know that it will never again be army green!

What do you guys think?


Thursday, November 3, 2011

Preserve or Perish?

I have only recently been compelled to treasure hunt among the little collections of furniture that occasionally occupy our neighborhood street corners, waiting for trash pick up. In times past I would think about driving back to look, but mostly ignore them. Instead, I would head for home, hoping that someone would see the potential in these "throw-aways" and treat them well.


So this past weekend when my husband found me rolling a sad looking buffet up our driveway - while happily chit-chatting with a neighbor who offered to help me retrieve it - he was shocked, to say the least. He accidentally alerted me to the buffet's existence, when he told me to run down and look at a side table in amongst a collection of throw-aways down our street. Unfortunately, the side table was beyond help.


But this...THIS is a dream!


When I decided to adopt it, I wasn't giddy with the feeling that I got something for free. Frankly, I felt more like I was rescuing a dog from the humane society. It always makes me sad to see something so mistreated - in this case covered in a thick layer of army green paint - and then tossed aside without a second thought to restoration. 

I wish I had thought to take a picture before we removed the three middle drawers (it's missing the top two side drawers) and started stripping off the paint. Believe it or not underneath is cherry wood. At one point, it was probably in beautiful shape and I wish I could just re-stain it, but the wood is too far gone in some spots.

So far, it has turned into quite the project. We don't have a garage, so I am forced to work on this when the weather permits and we still have daylight. Plus it is getting cold out! Each dry evening we have, my husband or friend Karen (pictured here) help to I roll it out of the shed - we sand and scrape off the old to prepare for the new, tuck it back in and say goodnight. 

I am scouring Pinterest right now for final finish ideas and I'll post some photos soon to get your feedback on how to rework this baby!